iOS Application Injection
Having been interested in jailbreaking iOS devices for almost a decade, combining security with this interest makes perfect sense. In this guide, I’ll document my method of checking if an application can have code injected.
Method 1 - Theos
The first method of testing is to create a tweak using Theos. To get all the necessary information, I use a combination of tools:
- Frida (https://frida.re)
- Passionfruit (https://github.com/chaitin/passionfruit)
- class-dump-swift
- Theos (https://github.com/theos/theos/wiki)
Installing Prerequisites
For this guide, I’m using:
- Jailbroken iPhone 6 running iOS 12.4.3
- Jailbroken using Checkra1n (https://checkra.in)
- Package
mobilesubstrateinstalled - macOS as the testing host
Note: Instructions may need to be modified for Windows or Linux.
Installing Brew
Install Homebrew on macOS by running:
/usr/bin/ruby -e "$(curl -fsSL https://raw.githubusercontent.com/Homebrew/install/master/install)"Installing XCode
- Install Xcode from the Mac App Store
- Install Command-Line tools:
xcode-select --installInstalling Theos
To install theos, I followed the tutorial. Summarizing, the following commands install Theos:
brew install ldid xz
echo "export THEOS=~/theos" >> ~/.profile
echo "source ~/.profile" >> ~/.zshrc
source ~/.zshrc
git clone --recursive https://github.com/theos/theos.git $THEOS
curl -LO https://github.com/theos/sdks/archive/master.zip
TMP=$(mktemp -d)
unzip master.zip -d $TMP
mv $TMP/sdks-master/*.sdk $THEOS/sdks
rm -r master.zip $TMP
Installing Frida
Installing Frida requires pip on the host. With pip installed, the following command installed the required tools:
On macOS (host):
pip install frida-toolsOn iPhone:
- In Cydia, go to Sources > Edit > Add
- Add source:
https://build.frida.re - Search for Frida
- Install Frida 12.8.1
Installing Passionfruit
- Install Node.js:
brew install node- Install Passionfruit:
npm install -g passionfriutInstalling the Test Application
For this guide, we’ll use the Damn Vulnerable iOS Application (DVIA) from http://damnvulnerableiosapp.com
Setting Up AppSync (iPhone)
On your iPhone:
- In Cydia, go to Sources > Edit > Add
- Add source:
https://cydia.akemi.ai/ - Search for AppSync Unified
- Install AppSync Unified 70.0
Installing ideviceinstaller
brew install libimobiledevice
brew install ideviceinstaller
Then install your app:
ideviceinstaller -i <path to ipa>Hooking the Application
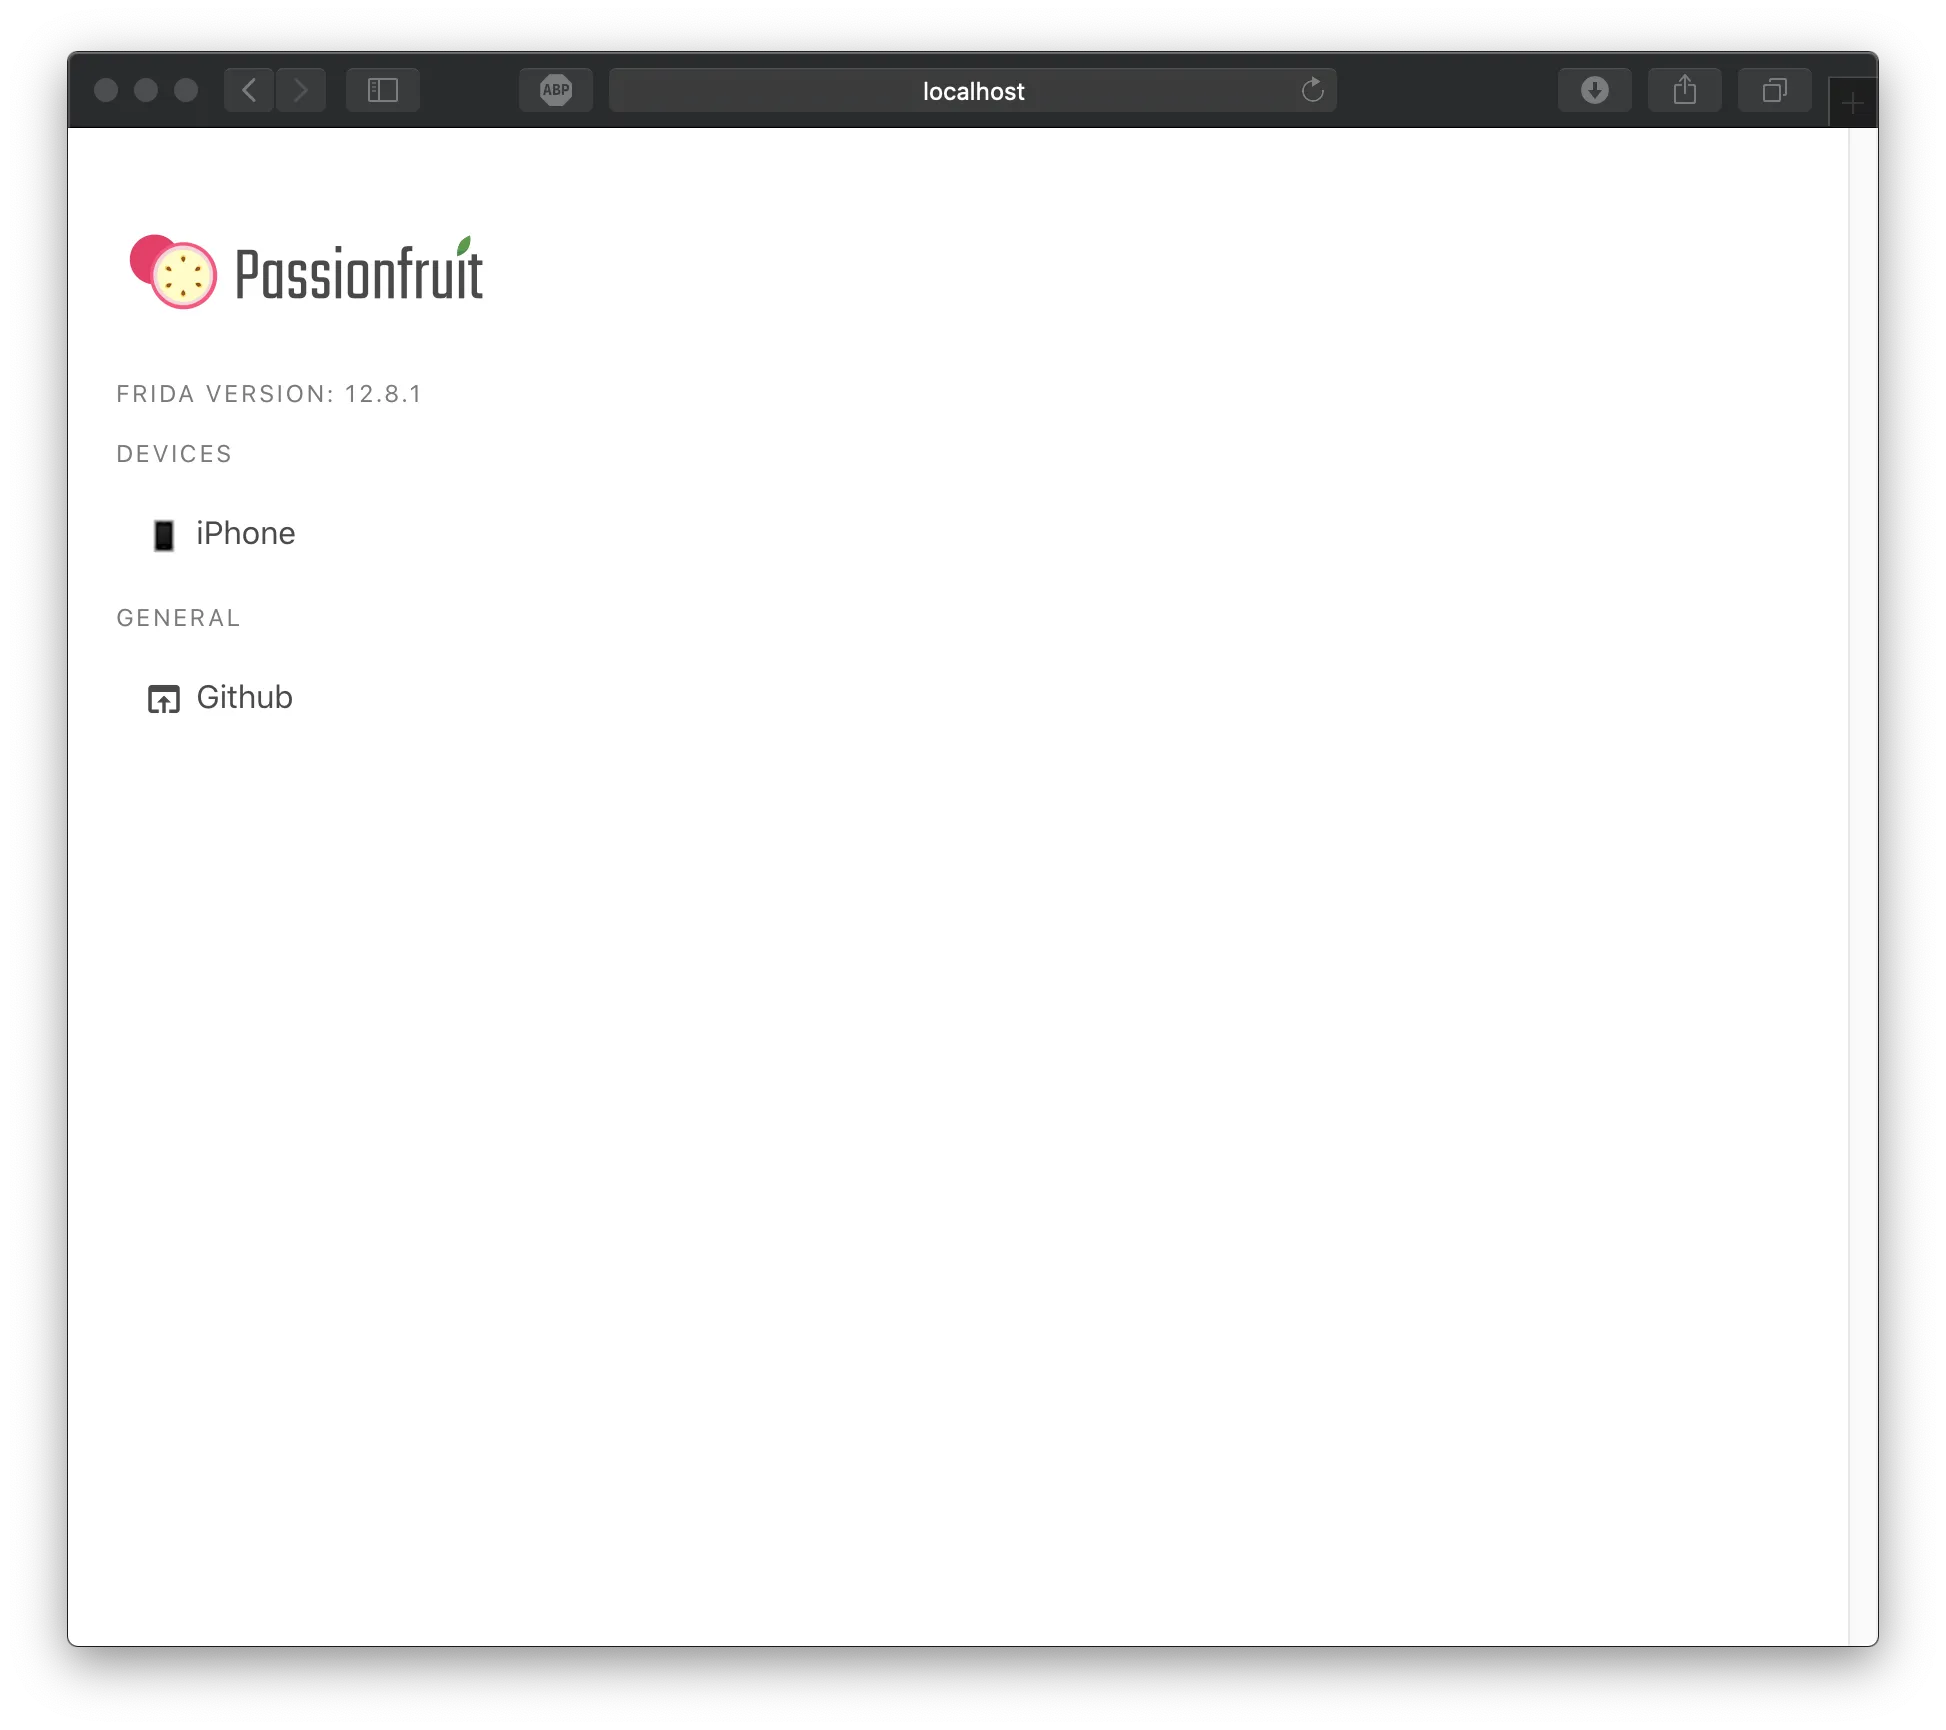
Hooking the application gives information on the application. In this case, I
use passionfruit for this. First I connect the iPhone to the host with a USB
cable. Then, in terminal, I run passionfruit, and browse to
http://localhost:31337, as seen:
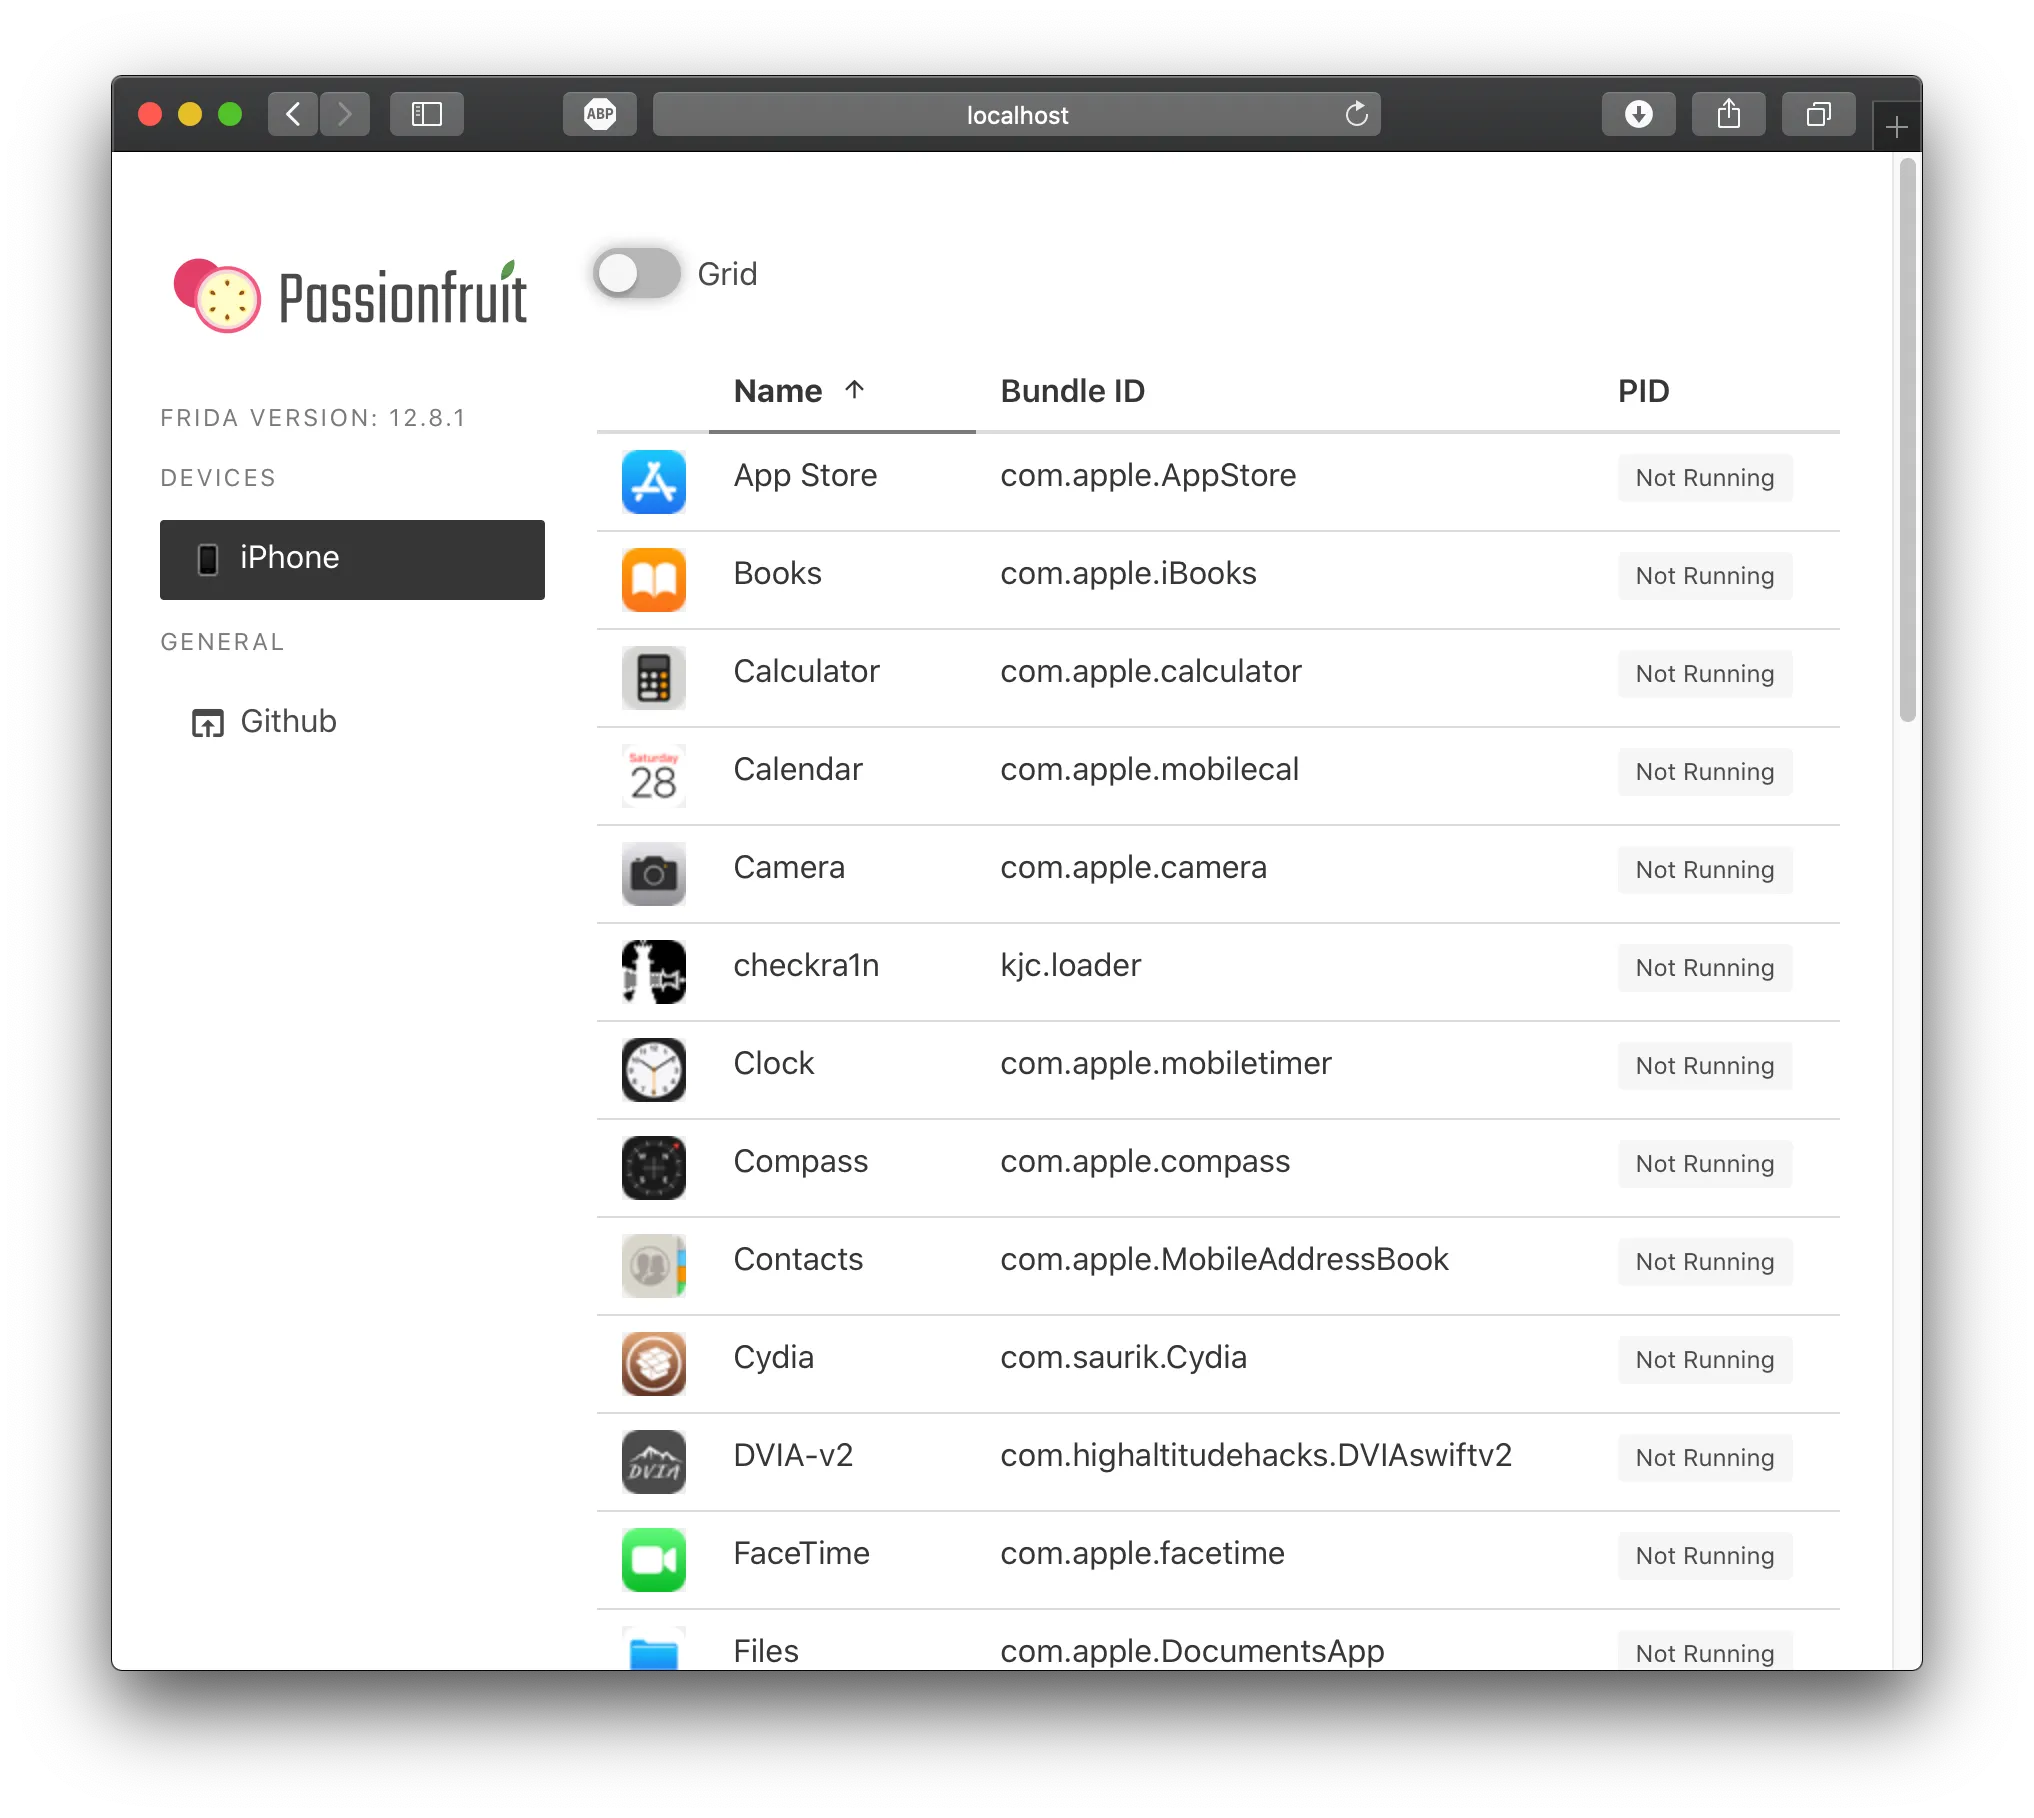
Clicking on the iPhone under the devices menu, we can see all the applications installed on the device:
Clicking on the DVIA-v2 application, I can see the details of the application:
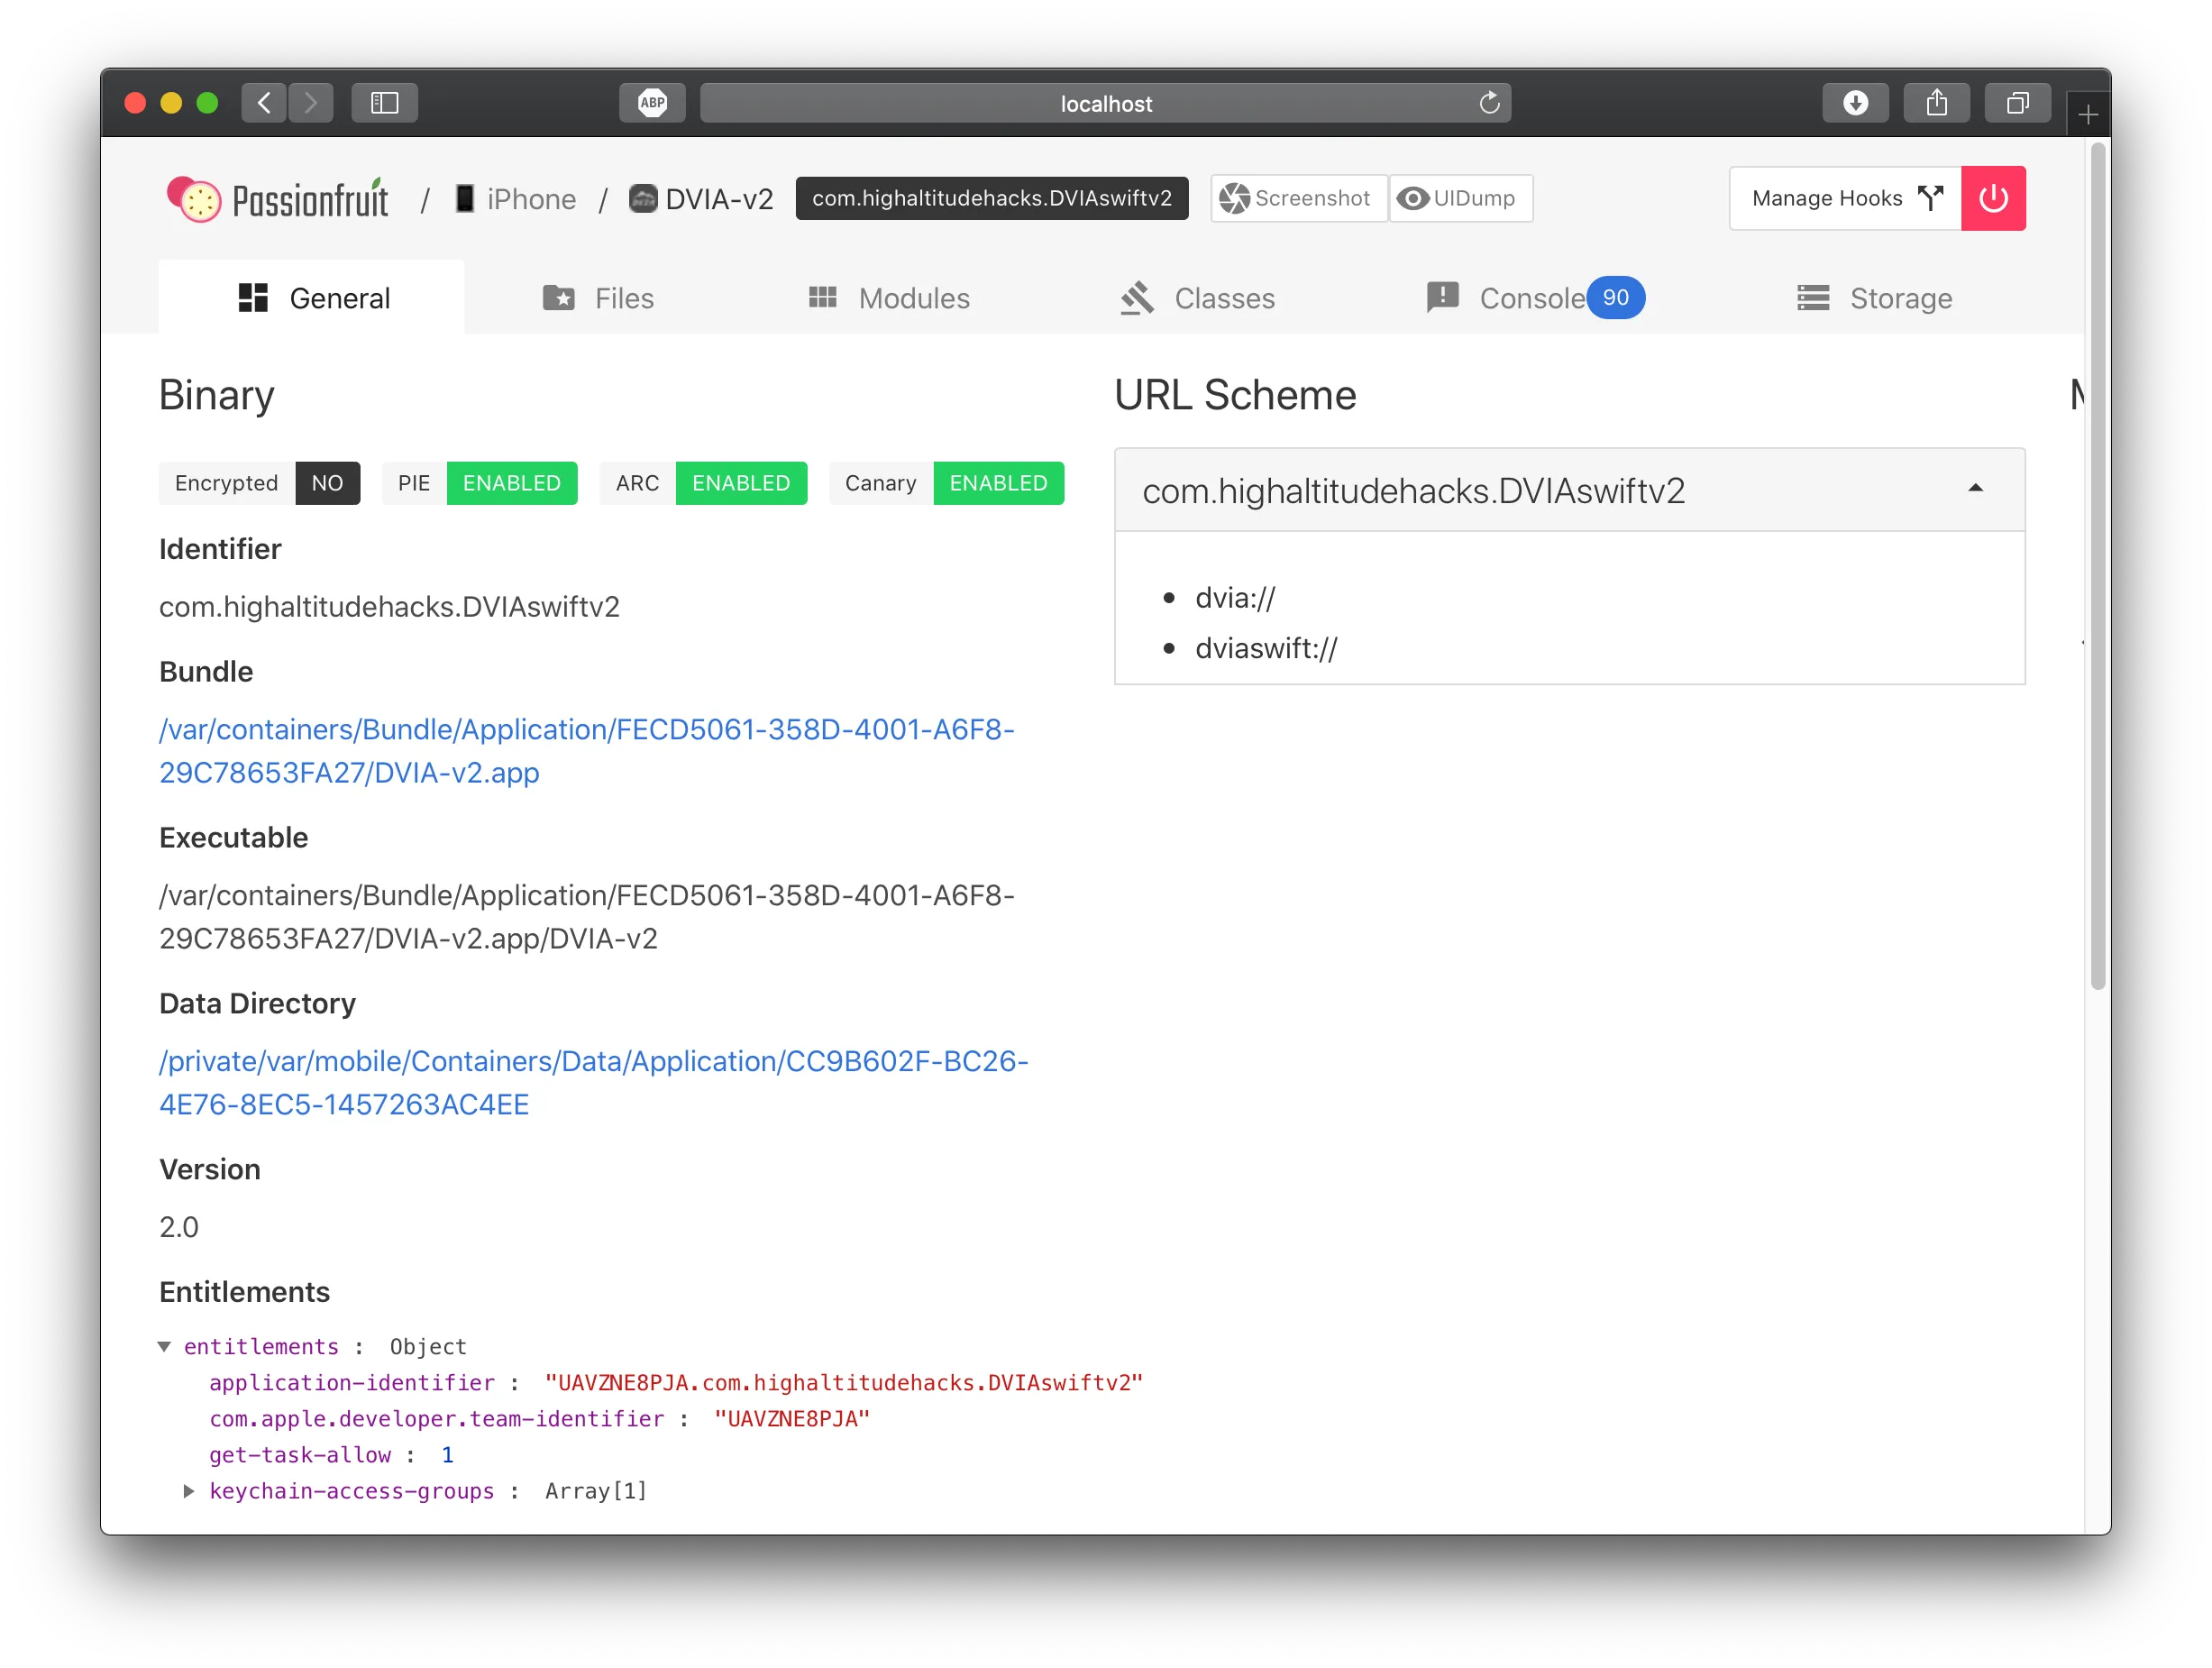
Important information to note on this page is identifier: com.highaltitudehacks.DVIAswiftv2
Next, its important to get the class to hook onto, which can be seen in the Classes tab. On page 2 of the classes tab:
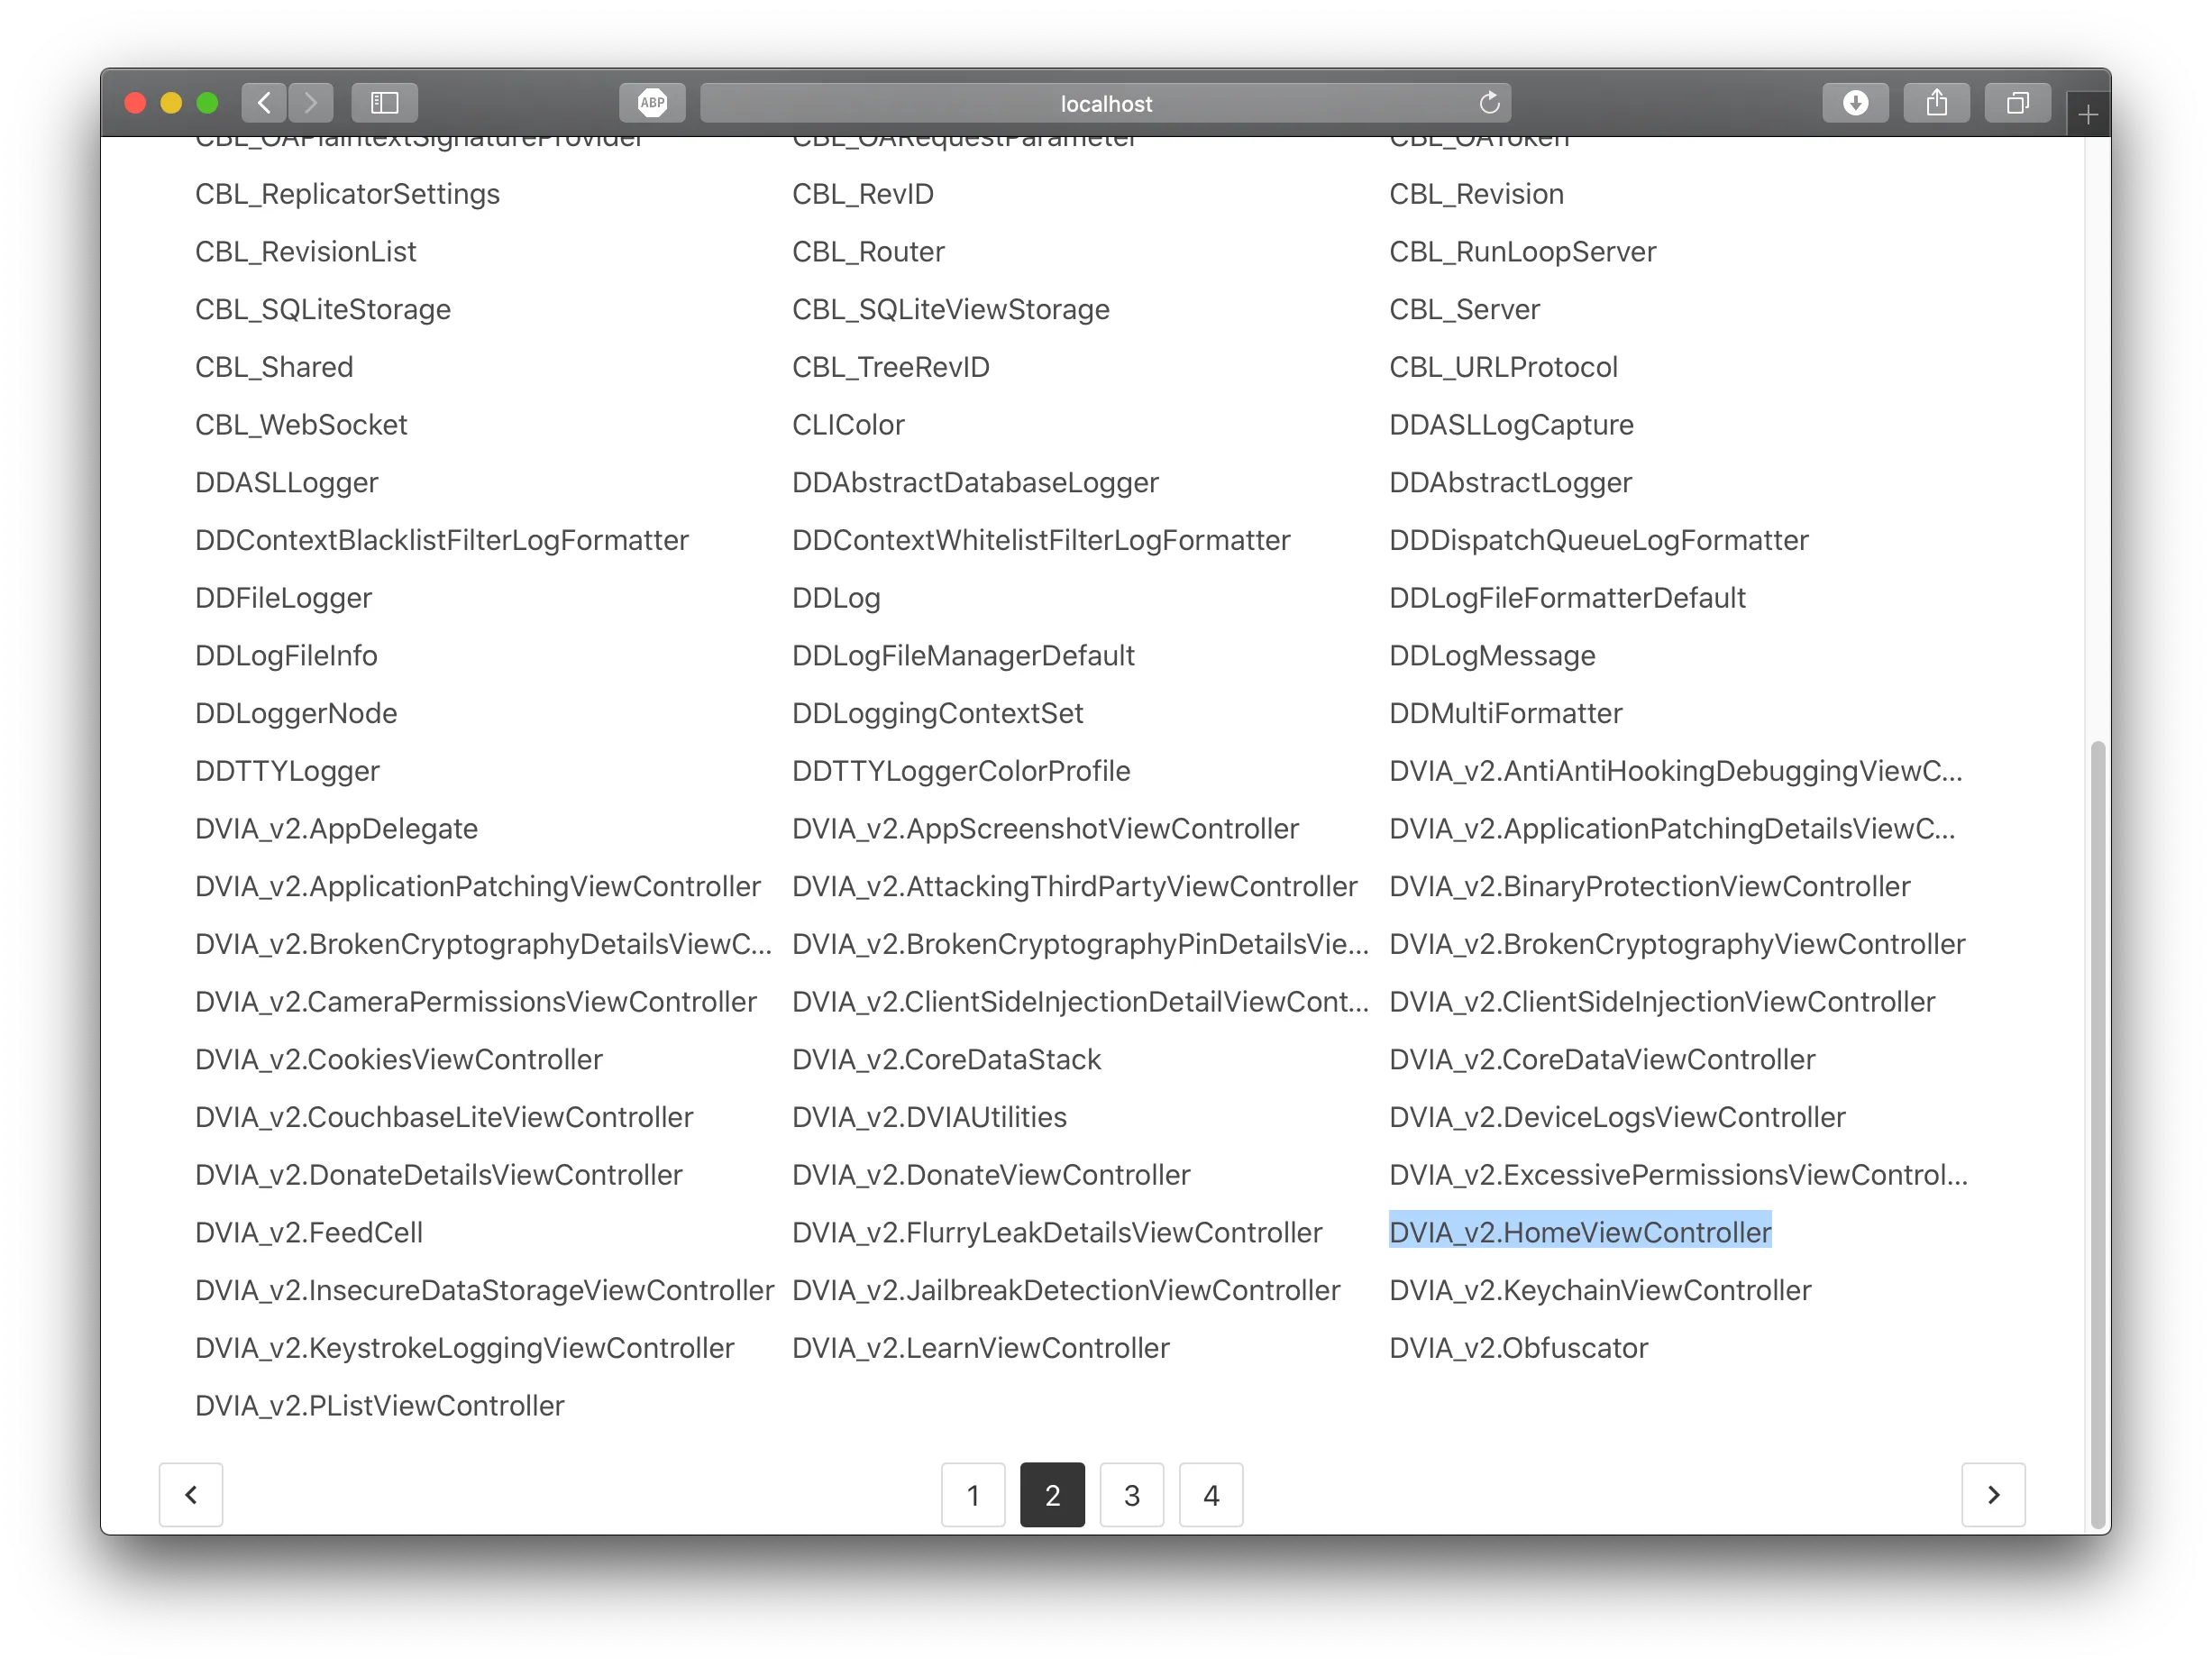
Now, having identified the class, I need to see the functions available.
Clicking on DVIA_v2.HomeViewController, I can see the classes available:
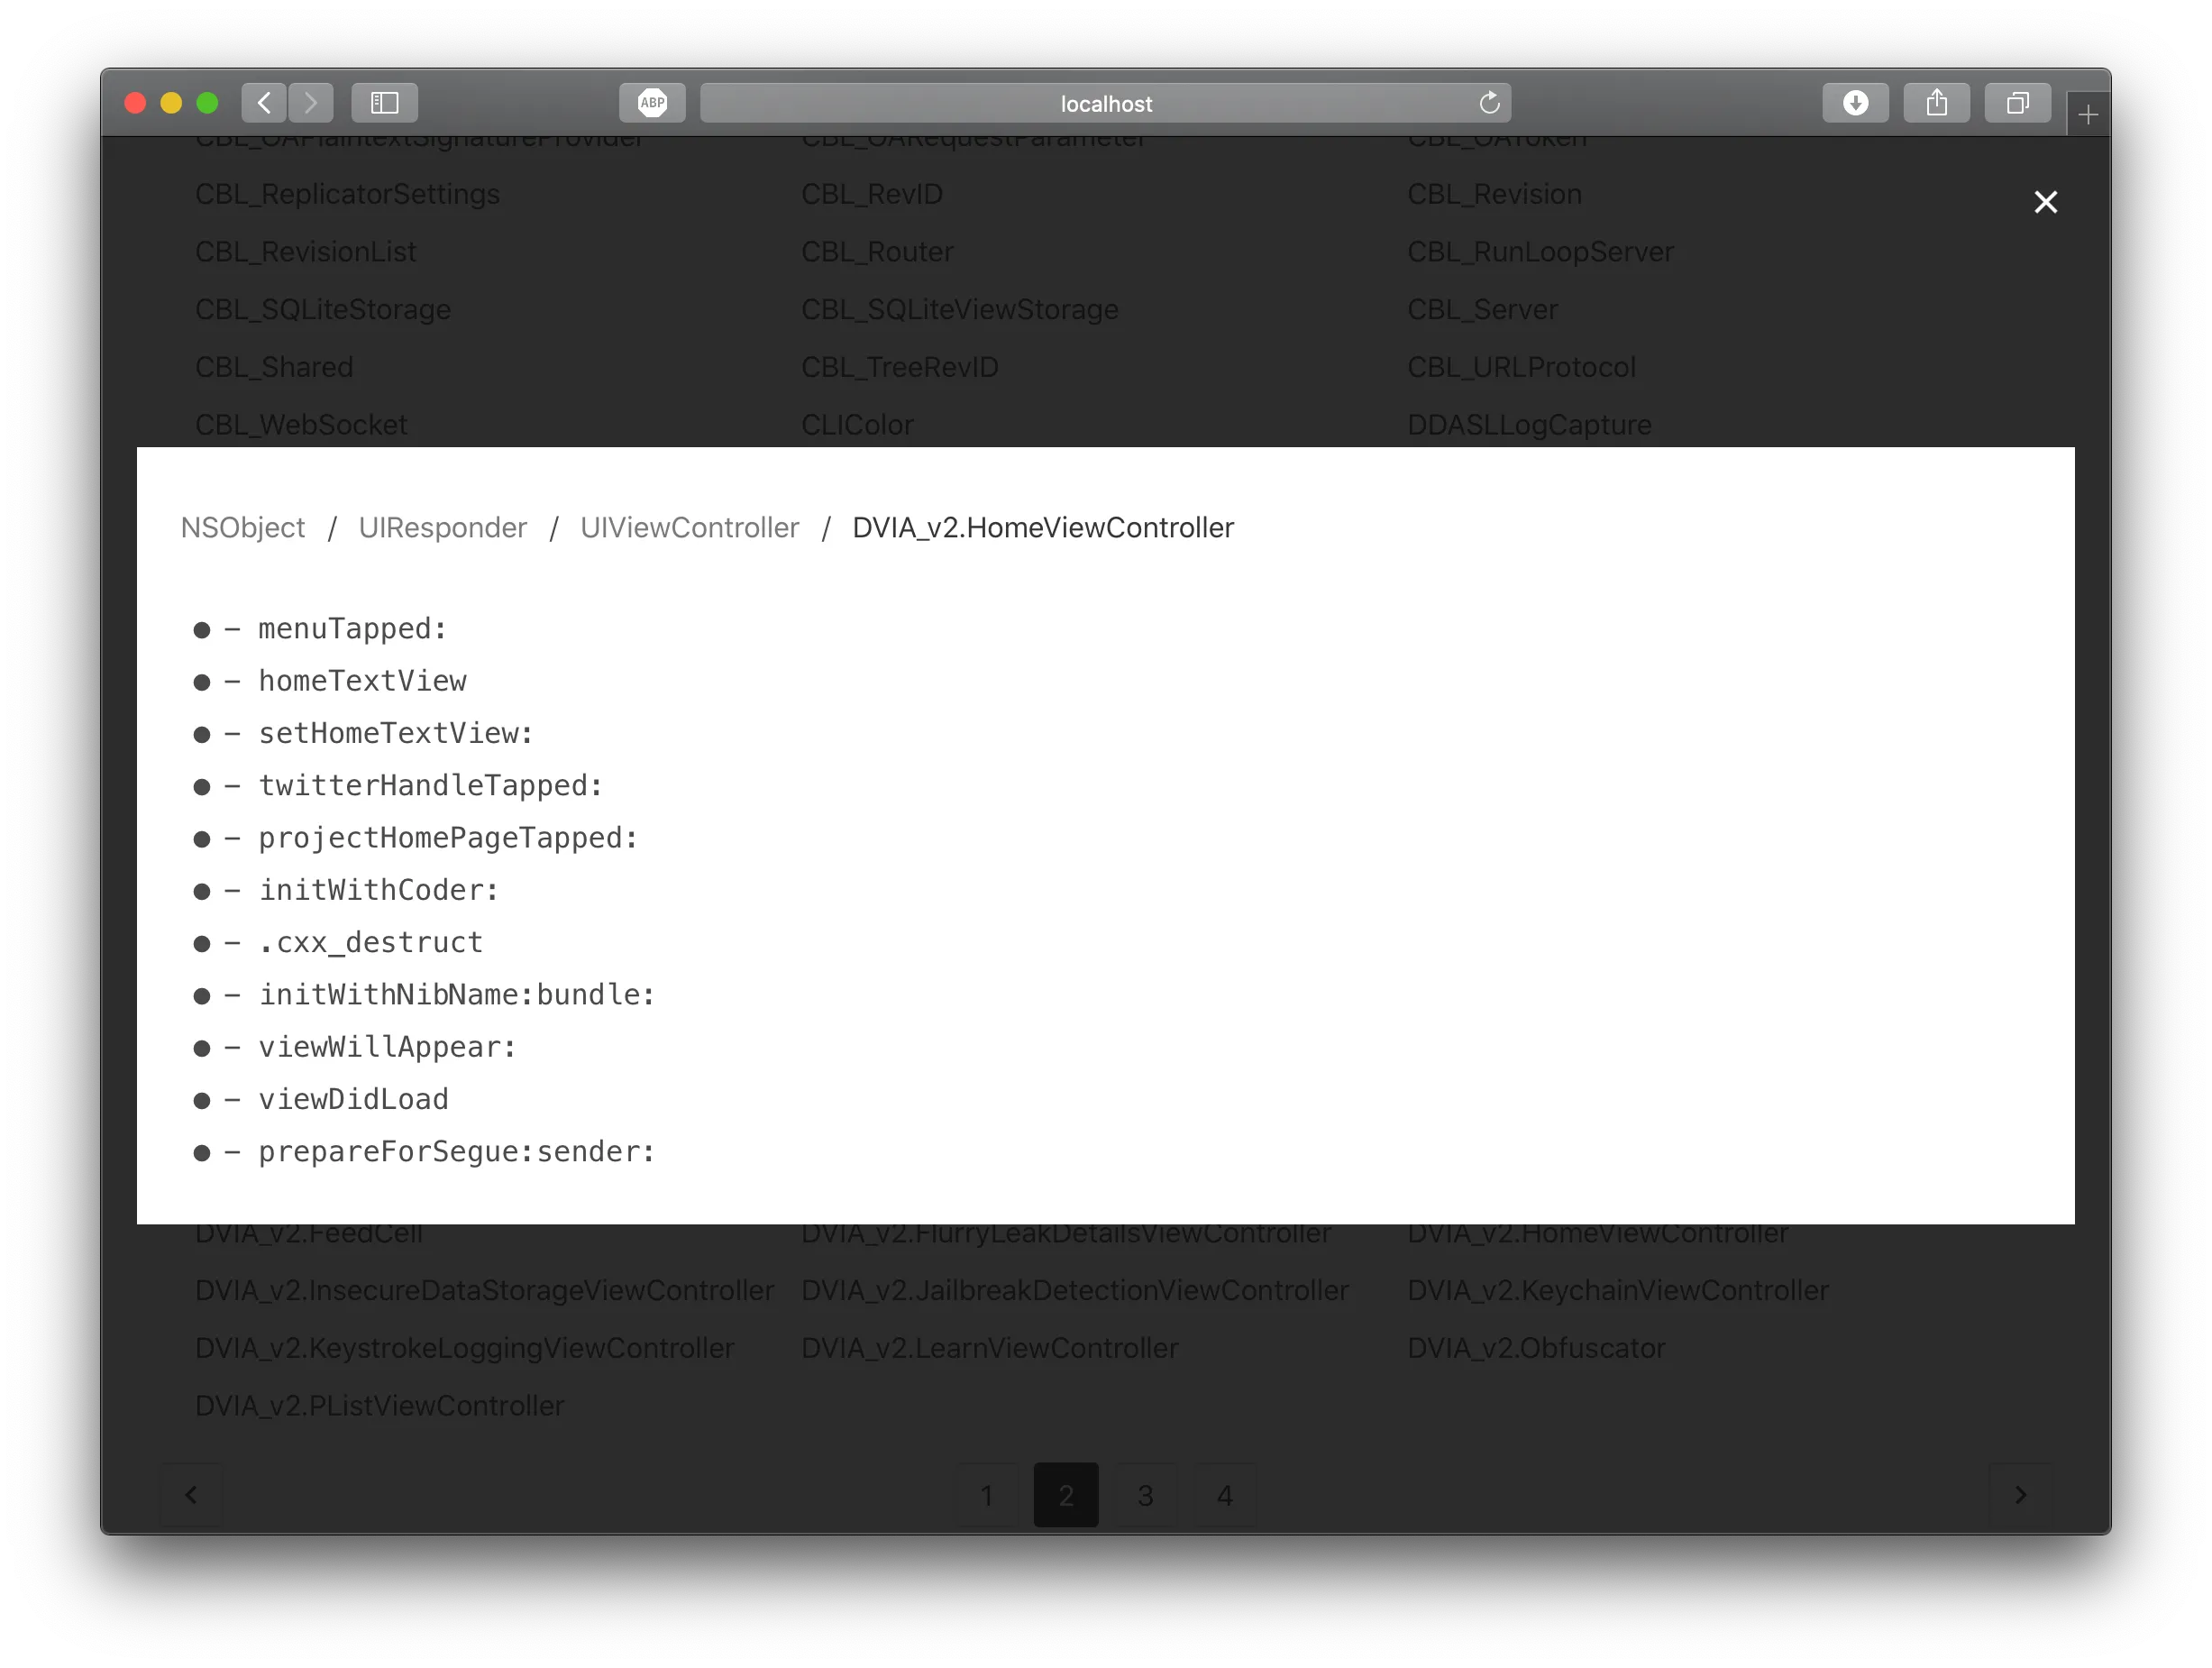
Here, the function to hook into is viewDidLoad.
Writing the Theos Code
Create a new tweak:
$THEOS/bin/nic.plWithin this menu, the only important thing is to choose option 10 - iphone/tweak. Other information can be modified to your personal preference.
Now, with the tweak directory, I rename the Tweak.x file to Tweak.xm.
There are a few different files created here:
- Makefile: The makefile defines how the tweak would be built.
- control: Defines information about the tweak
<Tweakname>.plist: This defines the applications in which the tweak will be injected into- Tweak.xm: Code that defines the tweak
While here, there are a few more changes to be made. Firstly, adding the device IP into the makefile allowing for remote installation of debian packages. This is done by adding the following to the top of the Makefile:
THEOS_DEVICE_IP = x.x.x.xNote: Replace the x.x.x.x with your own device’s IP address.
Additionally, change the <Tweakname>_FILES=Tweak.x to <Tweakname>_FILES=Tweak.xm
to correspond with the changes made earlier.
In the <TweakName>.plist file, the content was changed to:
{
    Filter = {
        Bundles = ( "com.highaltitudehacks.DVIAswiftv2" );
    };
}
This tells the tweak that the target application is the DVIAswiftv2, which we got from Passionfruit above.
The Tweak.xm file is changed to:
%hook classname

-(void)viewDidLoad {
    %orig;
    UIAlertView *alert = [[UIAlertView alloc] initWithTitle:@"Injection Test"
    message:@"A simple injection test on the application"
    delegate:nil
    cancelButtonTitle:@"Done"
    otherButtonTitles:nil];
    [alert show];
}

%end

%ctor {
    %init(classname = objc_getClass("DVIA_v2.HomeViewController"));
}
Important things here are that the class name is defined in the %ctor code
block at the bottom of the file.
Installing the Tweak
With the Theos Device IP defined in the makefile, installing the tweak is as simple as running the command:
make package installThe default root password is alpine.
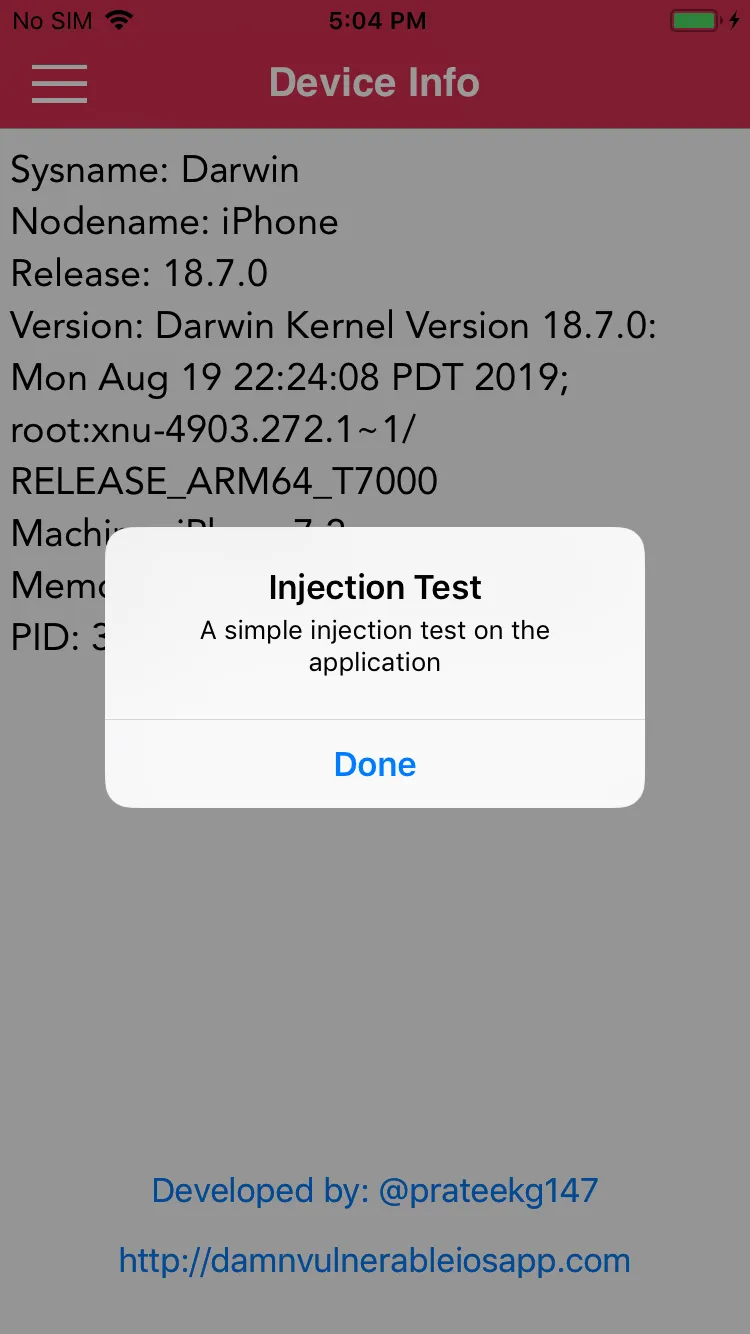
Outcome
With the tweak installed, running the DVIA v2 application, we see the alert defined in the tweak.xm file:
Conclusion
This guide demonstrates how to test iOS applications for code injection vulnerabilities. The process involves setting up a development environment, installing necessary tools, and creating a basic tweak to verify injection capabilities.
For questions or comments, I’m contactable at contact@arjunbrar.tech.